


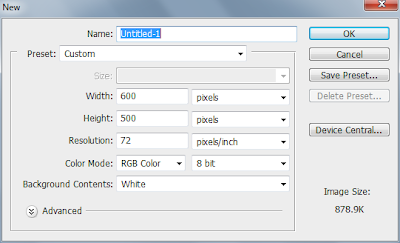
1.Get a new Photoshop Document to go File>New (Keyboard Shortcut: Ctrl+N ). Follow this picture and settings.
2. Create a New Layer (Keyboard Shortcut: Shift+Ctrl+N ). 3. Make a circle to use the Elliptical Marquee Tool and fill it with an orange color. You can use your own select orange color.

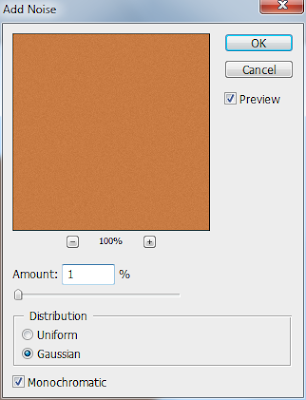
4. Now go to Filter>Noise>Add Noise and add Noise
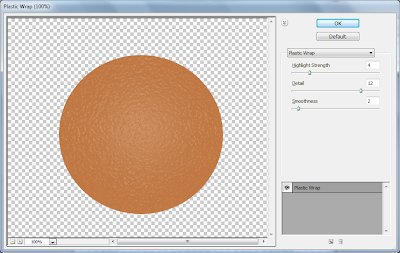
5.Go to the Filter>Artistic>Plastic Wrap with the following settings.
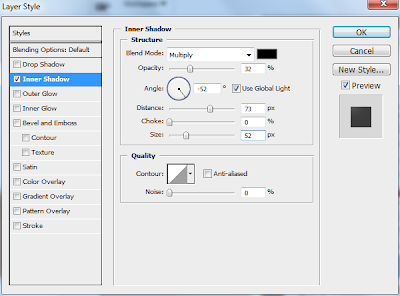
6. Now go Layer>Layer Styles>Inner Shadow and following this effects.
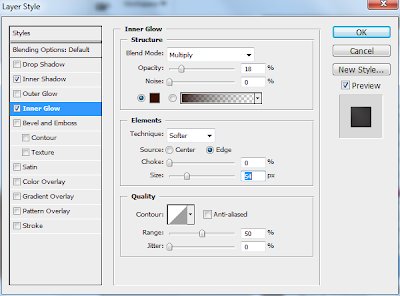
7. Go Inner Glow and following this effects.
8. Go Gradient Overlay and following this effects.
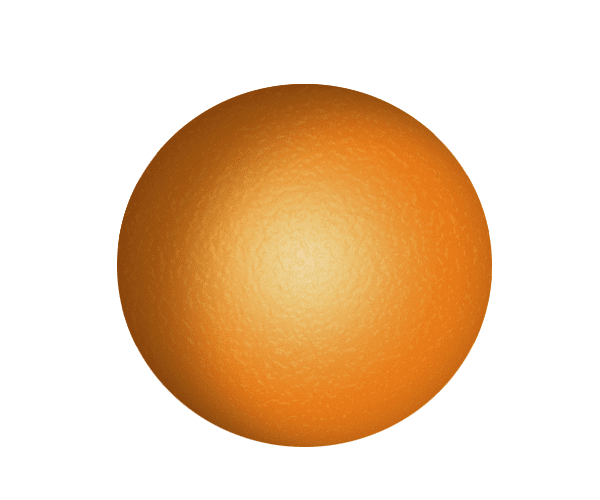
9. If you are done you’re all job correctly. You Orange look like this Orange:
Now we are add a Navel
10. Get a new Layer.
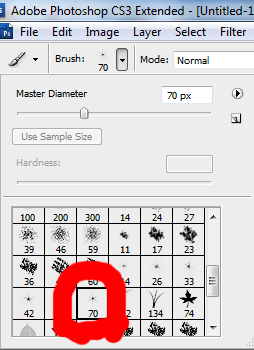
11. Select the Paint Brush Tool and choose the ‘star 70 pixels’ brush form your brushes palette. Without moving your mouse click 3-4 times to get a nice, dark star:
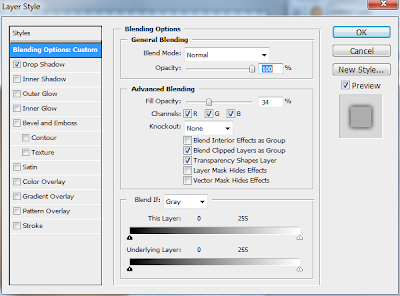
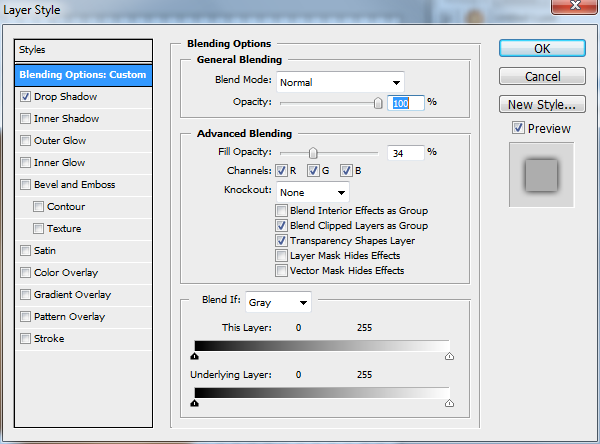
12. Now Go to Layer>Layer Styles> Blending Options and following this effects.
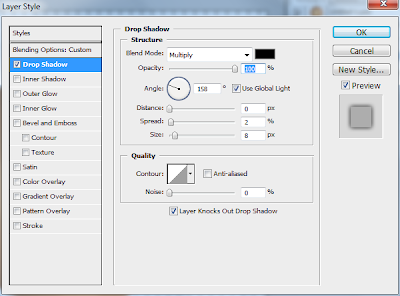
13. Go Brop Shadow and following this effects.
You are make your Orange. Now Save your Document.

